Sometimes a photograph has the right exposure and contrast but still feels slightly wrong. Maybe the grass is too yellow, the sky looks unnaturally cyan, or skin tones are competing with an orange background.
Increasing or decreasing global saturation rarely solves these problems because it changes every color at once.
That is where HSL adjustments become useful.
HSL stands for Hue, Saturation, and Luminance, three properties that allow photographers to control individual color ranges much more precisely. Adobe describes hue as the basic color, saturation as its intensity, and lightness or luminance as how bright or dark that color appears.
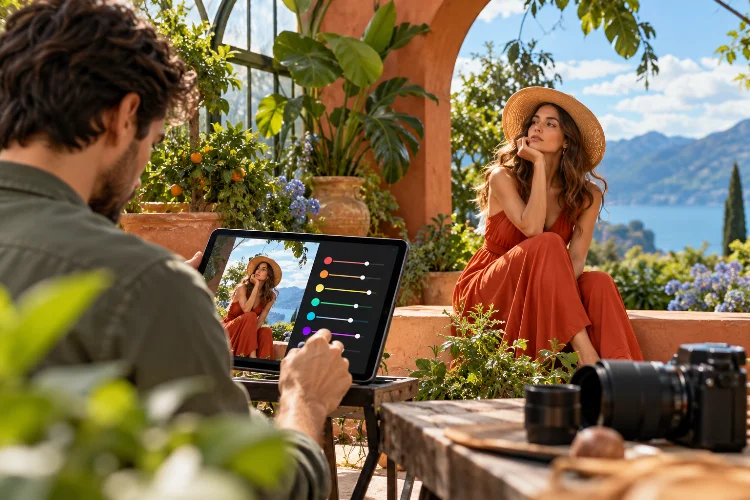
Understanding using HSL adjustments for precise color control in photography can dramatically improve editing. Instead of applying broad color changes, you can refine specific blues, greens, oranges, reds, and other ranges while protecting the rest of the photograph.
The result is cleaner color correction, stronger visual hierarchy, and a much more intentional photographic style.
Understand What Hue, Saturation, and Luminance Actually Change
HSL becomes easier once you stop thinking of it as one complicated panel and treat the three controls separately.
Hue changes what a color looks like. Moving the blue hue, for example, can shift skies closer to cyan or purple. Adobe’s Lightroom Color Mixer allows these changes to be applied to targeted color ranges rather than the entire photograph.
Saturation controls color intensity. Reduce it and a vivid green becomes quieter. Increase it and that same green becomes stronger.
Luminance changes the brightness of the selected color without simply brightening the entire image.
This distinction is extremely useful.
Suppose a blue sky looks too heavy. You might initially think it needs less saturation, but perhaps the real problem is that the blue luminance is too dark.
Raise blue luminance slightly and the photograph may immediately feel more natural.
Learning to identify which part of HSL actually needs changing prevents unnecessary adjustments.
Use Hue to Create Better Color Relationships
Hue adjustment can be incredibly powerful because it changes the relationship between colors.
Imagine photographing a forest where the foliage looks strongly yellow-green because of sunlight. If your intended style uses deeper, cooler vegetation, shifting the green and yellow hues slightly can create a more coherent palette.
You are not simply adding a color filter.
You are redefining how existing colors relate to one another.
This works particularly well in landscape, travel, fashion, and editorial photography.
A turquoise jacket can be pushed slightly toward blue to coordinate with a background. Yellow streetlights can be moved closer to orange for a warmer cinematic palette. A cyan sky can be shifted toward a cleaner blue.
But extreme hue changes become obvious quickly.
Skin, vegetation, and skies are familiar enough that viewers notice when they become unnatural.
Use small movements first. The strongest color grading often comes from several subtile corrections rather than turning one slider to its limit.
Control Saturation Selectively Instead of Muting Everything
One of the biggest advantages of HSL is selective saturation.
Global saturation affects the entire photograph, which means reducing an overwhelming green background could also drain healthy reds and oranges from skin.
HSL allows you to treat those areas differently.
Adobe’s current Lightroom Color Mixer provides separate saturation controls for targeted color ranges, while Point Color offers an even narrower selection when broad HSL categories affect too much of the image.
Suppose you photograph someone wearing neutral clothing inside a colorful city street.
The background contains bright red signs and intense yellow storefronts that pull attention away from the face. Reducing red and yellow saturation slightly can simplify the scene without making the person’s skin or clothing look flat.
Selective desaturation is especially useful for building professional-looking palettes.
Not every color needs maximum intensity.
Often, reducing competing colors makes the important colors feel stronger without increasing their saturation at all.
Use Luminance to Control Visual Weight
Luminance may be the most underestimated part of HSL editing.
Changing the brightness of a color can alter how strongly it attracts attention.
Darken blue luminance and a daytime sky can become richer and more dramatic. Increase orange luminance slightly and skin may appear brighter without changing the overall exposure.
DxO PhotoLab’s HSL controls similarly separate luminance from hue and saturation, allowing individual color ranges to become lighter or darker independently.
Consider a landscape containing bright green grass.
Reducing green saturation may make it less distracting, but lowering green luminance slightly can also give it greater depth.
These two adjustments produce different results.
Saturation determines how vivid the grass feels. Luminance determines how bright it appears compared with the surrounding scene.
Combining both carefully creates much finer control over visual weight.
This is particularly valuable when several colors are competing for attention.
Be Especially Careful With Skin Tones
HSL adjustments become more sensitive when people are involved.
Skin colors frequently occupy overlapping red, orange, and yellow ranges. A dramatic change to those channels can easily create orange faces, pale skin, excessive redness, or strange color separation.
That does not mean those sliders should never be touched.
Instead, make skin adjustments while watching the face rather than concentrating only on slider values.
For example, lowering orange saturation slightly may control overly warm skin, while increasing orange luminance can sometimes create a brighter, cleaner appearance.
But remember that the same orange channel might also affect clothing, walls, wood, or sunset light.
Capture One’s Color Editor demonstrates why narrower selections can be valuable: its Advanced mode can target defined shades and adjust hue, saturation, lightness, and the smoothness of the affected color range.
When broad HSL adjustments begin damaging unrelated areas, switch to a more targeted color selection or local mask.
Precision is usually better than forcing one global slider to solve everything.
Improve Skies and Foliage Without Making Them Artificial
Blue skies and green foliage are two of the most common targets for HSL editing.
They are also two of the easiest areas to over-process.
For skies, begin by looking at both blue and aqua. Many real skies contain information across both ranges.
Instead of immediately increasing blue saturation, try changing blue luminance first. A slightly darker blue can appear naturally richer without becoming excessively saturated.
Foliage is equally complicated.
Leaves may contain green, yellow, and even orange depending on lighting and season. Moving only the green slider might therefore leave parts of the vegetation unchanged.
Shift yellows slightly toward green when needed, then reduce saturation gently and adjust luminance to create depth.
The objective is not to make every forest identical.
Natural variation should remain visible.
A good edit keeps enough variation that leaves, grass, and background vegetation still feel like part of the original enviroment rather than a single painted color.
Use Targeted Color Tools When Standard HSL Is Too Broad
Traditional HSL divides colors into familiar ranges such as red, orange, yellow, green, aqua, blue, purple, and magenta.
That is convenient, but real photographs rarely fit perfectly inside those categories.
A shirt might sit between blue and aqua. A skin highlight might overlap orange and yellow.
Modern editing tools increasingly offer more precise alternatives.
Lightroom’s Point Color lets photographers sample a color directly from an image and refine the affected hue, saturation, luminance, range, and variance. Adobe also provides a visualization option to show which pixels are included in the selection.
Capture One’s Color Editor follows a similar concept by allowing photographers to select a narrower section of the color spectrum and modify its properties independently.
These tools are useful when a standard HSL slider produces collateral damage.
Think of traditional HSL as broad color control and targeted selection as precision work.
You will usually need both.
Build a Consistent Style Through Repeated Color Relationships
HSL adjustments are also useful for developing a recognizable photographic style.
Instead of memorizing exact slider numbers, identify color relationships that repeatedly appear in your work.
Maybe your greens are slightly muted and cooler. Perhaps blues are darker, warm colors remain brighter, and reds are restrained.
Those relationships can become part of your visual identity.
However, identical HSL settings will not produce identical results on every photograph.
Different cameras, white balance settings, lighting environments, subjects, and exposure levels change the starting color information.
A preset should therefore act as a starting point rather than a rigid solution.
Apply your base adjustments, then inspect the important colors individually.
This makes your portfolio feel consistant without forcing every scene into exactly the same palette.
Style comes from repeated decisions, not blindly repeated numbers.
Avoid Common HSL Editing Mistakes
HSL makes dramatic color changes incredibly easy, which is exactly why restraint matters.
One common mistake is pushing every slider simply because it is available.
If the reds already look correct, leave them alone.
Another mistake is judging color at only one zoom level. A heavily saturated background might look attractive when filling your monitor but dominate the composition when the photograph is viewed as a small thumbnail.
Watch for color transitions too.
Aggressive hue changes can create strange boundaries where neighboring shades no longer blend naturally.
DxO’s HSL tools include controls for selecting and refining targeted color ranges, while Capture One includes smoothness controls intended to help adjustments transition more naturally across neighboring colors.
Finally, compare before and after regularly.
Your eyes adapt surprisingly fast. After several minutes of editing, an overly green forest or extremely blue sky may begin looking normal.
Fresh comparison helps catch overprocessing.
HSL adjustments give photographers precise control because hue, saturation, and luminance solve three different color problems.
Hue changes the character of a color, saturation controls its intensity, and luminance determines how bright or visually heavy it appears. The real skill comes from knowing which control to use and when to stop.
During your next edit, avoid immediately increasing global saturation. Identify the distracting or weak color first, then experiment with its hue, saturation, and luminance separately.
Protect skin, watch transitions, and use targeted color tools when traditional HSL ranges are too broad. With practice, these small adjustments can create cleaner images, stronger color harmony, and a much more intentional photography style.